Pre-Owned Inventory Archives - Wheaton Chevrolet Of Red Deer

05-05-22

HOW DO I RESET THE OIL LIFE ON MY CHEVROLET?

One of the most convenient features in modern vehicles is real time monitoring in place for various systems and features. The most common one you'll likely interact with is your Chevrolet's oil life monitoring system. Whether you drive a Silverado, Equinox or Blazer, the oil life indicator will keep you advised when your vehicle needs servicing. When you receive your certified service at Wheaton Chevrolet, your technician will reset any warning codes and indicators on your vehicle but if you choose to change your own oil or have it serviced elsewhere, you may need to reset the indicator yourself in a few easy steps.

Resetting The Oil Life Indicator

To begin, start your vehicle and look at the driver information screen located in the instrument cluster.

From the main screen, use the left and right navigation keys on the steering wheel to move to the information menu (indicated by the 'i' icon)

Once on the information menu, use the up and down arrow keys located on the steering wheel or the scroll wheel located between the arrow keys to move through the menu. Continue scrolling until you reach the oil life monitoring system.

Follow the directions on the screen to reset your oil life. In most newer Chevrolet models, this will require simply pressing down on the scroll wheel. When prompted to confirm you'd like to reset the oil life monitoring system, use the left and right arrow keys to select yes.

Your Chevrolet oil life indicator should now read 100%. If not, you may have missed a step; just turn your vehicle off and start again from the beginning. If you're having trouble resetting your Traverse, TrailBlazer or Malibu oil life, stop by our dealership and we'd be happy to assist you free of charge. For more information, you can always contact our service department.


Read More

10-05-21

REMOTE START HEATED & COOLED SEATS

Modern vehicles are outfitted with so many features, you may not even be aware of everything your Chevrolet can do! If your vehicle features factory-installed remote start and heated/cooled seats, they can be programmed to work together.

5 Simple Steps

  1. From your vehicle's home screen, select 'Settings'
  2. At the top of the settings menu, find the 'Vehicle' tab
  3. Scroll down and select 'Remote Lock, Unlock and Start'
  4. Scroll down until you find 'Remote Start Auto Cool Seats' and 'Remote Start Auto Heat Seats'
  5. Make sure both settings are toggled on (the toggle indicator should appear green when on)

That's it, you're done! Now when remote starting your vehicle in cold weather your seats will automatically heat; in hot weather, they will automatically cool!

Read More

01-11-21

HOW DO I CONNECT MY PHONE TO MY VEHICLE?

Vehicles have more features than ever these days which is great! Unfortunately, that can also be frustrating as you try to learn how to use your new vehicle to it's full potential. One of the most common questions we get is from customers trying to connect their smartphone to their new vehicle. It can be done in just a few quick steps and should take less than 5 minutes.

Step 1 - Getting Ready

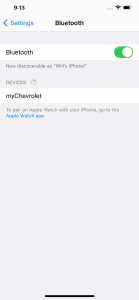
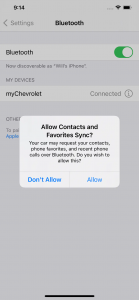
The first thing you need to do is locate your phone's Bluetooth connection feature. On both iPhone and Android devices, this should be located in Settings > Bluetooth:

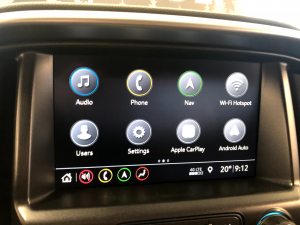
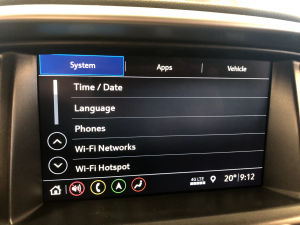
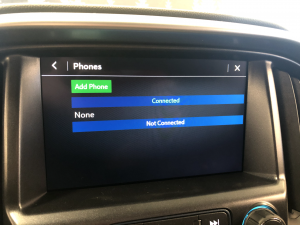
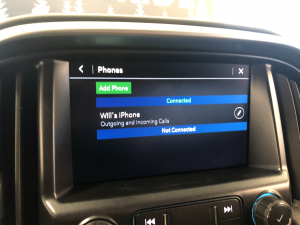
Once you've done this, you need to navigate to phone pairing on your vehicle's entertainment system. In most vehicles, this will be located in Settings > Phones:

Step 2 - Connecting Your Phone

Now you're ready to pair your phone! On your vehicle's control screen, press the button that says "Add Phone". On your smartphone screen, you should see your vehicle's Bluetooth connection appear:

Next, click on your vehicle's connection and your phone will begin the pairing process. In most cases, you will be shown a one-time connection number on both your smartphone and your vehicle's control screen to verify you are connecting to the right device. If these numbers do not match, you may be connecting to the wrong device and should restart the process from the beginning:

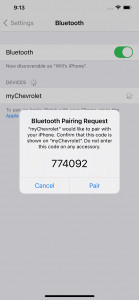
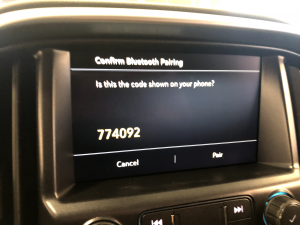
If the numbers match, click "Pair" on both your smartphone device and your vehicle's control screen. In a few seconds, your phone's screen should say "Connected" and you should see your phone on your vehicle's screen:

Congratulations, you've successfully paired your phone and can begin safely making handsfree calls via your vehicle's audio system!

Step 3 - Syncing Your Phone

To get the most out of your vehicle's handsfree Bluetooth features, you'll want to sync your phone's contacts to your vehicle. This allows you to make phone calls simply by giving your vehicle's handsfree system a contact name, rather than having to enter the number each time. (E.g. "Call John Smith".) When your Bluetooth connection is first established, your phone should prompt you for permission to sync contacts:

In some vehicles it may take several minutes for your contacts to fully sync with your vehicle so be patient. If you experience any trouble, try restarting the process from the beginning.
Read More
Your Matches
Filters

Contact Us:

Name:
Email:
Message: